Everyone has been RAVING about coconut oil lately. As I read post after post about the uses for coconut oil, I came across several that mentioned washing your face with it. I thought, "Who washes their face with oil? Isn't that what you're trying to get rid of? How in the world is that gonna work?" Lets just say I didn't believe it what so ever.
After reading all of these posts I decided "Why not? My face can't break out anymore than it already is." Boy was I wrong!! I tried it and absolutely hated it! My face immediately broke out and I was mad ya'll. Beyond mad!
As I looked around online for more information about washing your face with coconut oil (as I wanted to be more conscious about what I put on my skin) I found some great information. Unfortunately I forgot to bookmark the pages and can't find them again. I can tell you what I learned though. They don't tell you that your face will absolutely break out at first. If you have clogged pores then get ready. The reason for this is that the coconut oil is getting deep in your pores and pushing the dirt and nasty oil that is stuck in there out towards the surface. So, of course, you are going to break out. If you keep at it though you're skin will clear and be absolutely amazing!
A lot of the information out there doesn't tell you how to wash your face with oil and it makes a HUGE difference. It's not face wash and should not be treated as such. That's where I went wrong the first time. I would get my face wet, put the oil on it, rub and scrub, and then rinse off. That's not even close to how it should be done. But hey, how was I suppose to know?
The way you are suppose to wash your face with coconut oil is by putting the oil on your face first, don't worry about getting it wet first. Water and oil don't mix so the oil won't be able to work right. After you rub and scrub your face take a warm washcloth and scrub your face with it. This will remove any excess oil and the heat will allow the coconut oil to get deeper into your pores. I will occasionally take a little bit of baking soda and mix it with the oil in my hand and then scrub. I like to have a little bit of a scrub occasionally to help remove dead skin and make my face super soft. Then just follow up with the Thyme Face Toner that we've already made.
Just remember ya'll, going to an all natural face regimen takes time. Usually your skin is so use to having all of the chemicals and having clogged pores that as soon as you take that away it's going to freak out. Be patient and you will definitely see a difference.
AMAZING DIY Lotion
I've been searching for a DIY lotion that didn't require me buying ingredients that I wouldn't normally have. Of course I wanted it to include coconut oil! It's the most amazing thing in the world. It's good for you to eat, great for your skin, is all natural, and has many, many other uses. I could probably go on for days about everything coconut oil is good for.
I kept reading about this amazing hand lotion but it didn't include coconut oil so I immediately dismissed it. Why I didn't think to just substitute coconut oil is beyond me. Luckily I eventually thought of it. Thank goodness too, because I couldn't find a recipe I liked. Coconut oil is great all by itself for a moisturizer but I wanted something that was easier to spread and use.
So here's what I did. I just took a bottle of baby lotion that I already had and mixed it up with coconut oil in my mixer! So simple!! I had a bottle of shea butter and cocoa butter baby lotion. It comes in a yellow bottle and is great for dry skin. I already had it because Letty has very dry skin and eczema so I was trying that out. It worked okay but not as well as I would have liked so I quit using it and it was just lying around. Of course I already had the coconut oil. So all I had to do was mix them up till it turned into an icing like texture and put it in mason jars.
I absolutely LOVE the lotion!! It's great for my skin. It doesn't leave me feeling really oily like just using the coconut oil does but moisturizes AMAZINGLY and leaves me feeling very soft (just ask my husband). I feel like it's going to be great for my growing belly too. I used it on Letty this morning and she didn't have dry skin halfway through the day like normal. Hopefully it will help with the eczema too.
You can use any baby lotion you have on hand or any one that you like the smell of. I think next time I'm going to use the lavender baby lotion. I think lavender and coconut would smell AMAZING! Oh! Add Vitamin E to it too if you have it on hand or don't mind buying it. I didn't have any so I didn't bother. Vitamin E if GREAT for your skin.
If you love coconut oil, or it you're just getting into it, try this lotion. You won't be disappointed.
Amazing DIY Lotion
- 1 cup coconut oil
- 16 oz baby lotion
- Vitamin E (if you have it)
Take a whole 16oz bottle of baby lotion and 1 cup of coconut oil (not melted) and mix together in your mixer. Add the Vitamin E if you are using it too. Just mix together until it's the texture of icing. That's it! Just put in containers.
If your coconut oil is melted then this won't work. If your coconut oil has melted just put the container in the fridge to get it hard again.
Hope ya'll enjoy!
Boys Vs. Girls
As ya'll know, I'm pregnant (and have two beautiful girls already.) At this time we don't know what the baby is. Could be a boy, could be a girl. All I want is a happy, healthy baby.
That is definitely not the case when I tell other people that I'm pregnant. Since I have two girls, all I get is "I know you're hoping for that boy!" or "Wow! I really hope it's a boy this time."
At first, I just brushed it off. I didn't let it bother me. It's just how people are in the south. But I got to thinking today, after I read a wonderful post on Shakespeare's Mom, that I should really say something. While it might not be to the people that say these things personally, I should say something to someone. So I'm telling ya'll. Hope you don't mind.
Here, in the south, boys are put above all else. My husband's family was very disappointed when we found out I was having a girl each time I was pregnant (I was ecstatic!). You don't know how much of their clothes were little boy clothes ya'll. Don't get me wrong! They absolutely love their grand-daughters and wouldn't change them for anything.
What I wish people would realize is, GIRLS ARE WONDERFUL! They are no less than a boy. They are no harder to raise than a boy (although I don't know personally). Girls are not a burden. I love my girls! And I would love another one. Just as I would love a little boy.
Don't look sympathetic at others because they have all girls. I can guarantee they wouldn't have it any other way. I wouldn't.
Life With A Toddler
Hey ya'll! I saw the perfect parent picture on facebook today and I just had to share. I think it accurately describes every mothers day (and some fathers too).

I know this is my day with my 1 1/2 year old daughter. Except most of the time it's Letty throwing things at Hailey instead of me. All day long it's "Don't hit your sister!" , "Don't throw that at her!". But I know that I wouldn't change it for anything, as I'm sure ya'll wouldn't. We can definitely say that life is never boring at our house.
I know what some are thinking, "Why don't you just do this, this, or this? You wouldn't have that problem." Well, you know what, we would still have that problem. Kids are Houdini's who can unlock every child proof lock there is and can disappear in the blink of an eye. It's truly amazing.
I hope ya'll got as good a kick as I did out of this picture. And I hope it reminds you to cherish every moment you get because you only have that moment once. Tomorrow they will be one day older. What are some funny things that have happened to you with your kids?
Let's Celebrate Thanksgiving!
In my family Thanksgiving is a BIG deal. My husbands birthday is around that time and his Granny comes in from out of state. It's very busy and very fun. We all LOVE to eat and we love getting together.


So let me say that when stores have Christmas stuff out well before Halloween has even been celebrated it DRIVES ME CRAZY. Don't get me wrong, I like celebrating Christmas. But I believe that every holiday should have its own time. Right now, at the beginning of November, when I walk in the grocery store all I see is Christmas. They have one small display for Thanksgiving. Not to mention when you walk in ANY other store all the Christmas trees are up and decorations are out.
Is Thanksgiving soon going to be out? I mean, we are suppose to be celebrating when the pilgrams came over and make peace with the Native Americans and celebrate everything we are thankful for. For me and my family this is a special time of the year that we can celebrate something that doesn't involve presents. The kids actually think about what they are thankful for and celebrate life.
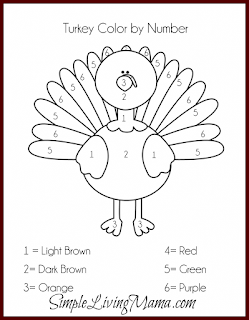
So, to celebrate Thanksgiving a little bit I found some turkey color by numbers, regular coloring pages, word searches, and an art project. These should help the kids get ready for Thanksgiving when everywhere around them is already celebrating Christmas.

You can find this color by number here. She also has lots of other color by number pages and very cute ideas.

This one can be found here. There is also A LOT of other activites for the kids to do on this site.

Hailey loves word searches so I thought she would love this one. She did! Go to this page to download the word search and print it out.

Both of my little ones LOVE to color. They could do it for hours. So why not color Thanksgiving pages for everyone? Get them here.

Most kids love paint. It's messy and they can make something beautiful out of it. Just make sure you have lots of newspaper to lay down so paint doesn't get everywhere. I saw this great idea on Minne-Mama.
I hope ya'll celebrate Thanksgiving with family this year. These pages will give the kids PLENTY to do while you prepare too. Happy Thanksgiving ya'll!
My Top 10 Uses for Hydrogen Peroxide!
I have a secret ya'll. I know I shouldn't keep them but it has been so good to me. Also, you can always find something else to use it for. The applications are ENDLESS!!! Ok, ok. Here it is:
Hydrogen peroxide isn't just for cuts anymore! I wanted to share some other uses for this miracle liquid.

What are some of the ways ya'll use hydrogen peroxide in your home? Or even outside? I never thought about that. I bet you could use it everywhere!
Hydrogen peroxide isn't just for cuts anymore! I wanted to share some other uses for this miracle liquid.

- Listen up! This magic stuff gets out blood stains!! All you do is put the item in the sink and pour the peroxide over the stain. Just let it sit for a couple minutes then fill the sink with HOT HOT water. Let it sit for a while. Just repeat till the stain comes out. It usually comes out the first time but if it's an old stain it might take a couple of times.
- This AMAZING stuff will get out pretty much any stain. All you do is mix up 1 tablespoon of Dawn dish soap, 2 tablespoons of hydrogen peroxide, and 1 - 2 tablespoons of baking soda. Only make a small amount of this at a time because hydrogen peroxide can become less effective when exposed to light. Just take a small brush (toothbrush) and scrub this mixture into the stain, let it sit, then wash as normal. I would first try this in a small spot first so you know it's not going to discolor or change your clothes in some way. I actually started using this wonderful stain remover after I saw it on Fabulessly Frugal. Baby's make A LOT of stains and regular detergent and stain removal stuff just won't get it out. Especially spit up! I wish I had this recipe when Hailey was little. It would have saved A LOT of her clothes.
- You can also use it as a regular cleaner. Just put some in a spray bottle and spray everything down with it! Just, whatever you do, DO NOT MIX WITH VINEGAR!!!!! It will make Parecitic Acid and it is potentially corrosive and irritating. You can clean with them seperatly on the same surface, just don't mix them in the same bottle.

- Ok, everyone has those nasty cookie pans that you can never get clean. They always end up looking the same no matter how you clean them or how much you scrub. Well, here is the solution! Take the miracle cleaner (hydrogen peroxide) and some baking soda and scrub your pan. It will end up looking as clean as it was when you bought it.
- It is also really good for ear infections or swimmers ear. When I was little, my mom would soak a cotton ball in hydrogen peroxide and place it in my ear when it was hurting a little (I ALWAYS got ear infections). You can also just pour a little bit in the ear. It will fuzz up a lot then quit. It really does help.
- You can use this to whiten your teeth too! Just take a little bit of toothpaste, 1 teaspoon of baking soda, 1 teaspoon of hydrogen peroxide, and just a little bit of water. Mix it all together and brush your teeth as normal. Only use it once a week though until you reach your desired whiteness, then only do it once every month or two. I haven't tried this one personally but I have talked to some people that have and they say it works GREAT! I am definitely going to try it in the VERY near future. I originally saw this idea on WikiHow.
- The mircale cleaner (hydrogen peroxide) even works for a natural mouthwash. Mix even amounts of the miracle cleaner and water and swish in your mouth for a minute. It's as simple as that! It kills bacteria and freshens breath. I don't think I could do this though. I REALLY don't like the smell of peroxide so I don't think I could put it in my mouth like that. I am going to try the oil pulling with coconut oil though. I'll let ya'll know how that goes.
- For everyone who paints their nails! Use this to whiten your nails after you take the polish off. Make sure you rinse after you do this though.
- Pour this on your cutting boards after using them too. It will kill all that nasty bacteria that raw food leaves behind.
- Last, but not least, is using this miracle cleaner to clean cloudy glasses. It always happens. You clean your glassware in the dishwasher and it comes out cloudy looking. You know they're clean but they just don't look it. Clean them yourself with hydrogen peroxide and they will shine like new!


What are some of the ways ya'll use hydrogen peroxide in your home? Or even outside? I never thought about that. I bet you could use it everywhere!
Meatloaf Cupcakes
I had to share this recipe with ya'll. It's sooo simple and takes no time to cook. It's meatloaf cupcakes!! They are so simple and you can put together a good home cooked meal in about 30 minutes. Who doesn't like to sit down to some good meatloaf and mashed potatoes?
All you do is mix up your meatloaf like you normally do. You can use any recipe you want, but I'll include the one I use at the end of the post.


Just preheat your oven to 350 degrees and put your meatloaf mix in a regular sized cupcake pan. Bake it for 20 - 30 minutes (depending on your oven). It's as simple as that! You can make your mashed potatoes while your meatloaf is in the oven and you have a great home cooked meal!

All you do is mix up your meatloaf like you normally do. You can use any recipe you want, but I'll include the one I use at the end of the post.

This is how they will look when you fill the cupcake pan up. I overfill mine some and they do just fine.

I kept getting photobombed my the kids! They love helping out in the kitchen, especially with this meatloaf!


This is how it will look when it's all done! There is a little grease, but it's not near as much as when you cook it in a loaf pan.
When you let the meatloaf cupcakes cool a little you can get them out really easy with just two forks. Just use them like tongs and pick them up out of the cups!
Meatloaf Cupcakes
- 2 pounds hamburger meat
- 1 bell pepper, chopped
- 1 onion, chopped
- 2 eggs
- Italian bread crumbs (Just use as much as you think is right. I've never measured how much I put in there.)
- Salt & Pepper
- Garlic, minced (I like a good amount of garlic but just add this to your taste.)
- Couple splashes of A-1
- Ketchup for the top.
- Preheat the oven to 350 Degrees.
- Mix all ingredients together in a large bowl.
- Form a small ball of your mixture and place in cupcake pan. Squish it down so that it fills the cup.
- Place ketchup or which ever sauce you like, on top.
- Bake 25 - 30 minutes
I hope ya'll enjoy the recipe! My family loves this way of eating them much better than the loaf. Let me know how your family likes it.
Natural Face Toner for Acne
Sorry I haven't posted in almost a week ya'll but life has been HECTIC. Hailey had hours of homework almost every night and now it's red ribbon week and we had to prepare. Hailey wanted to come up with something great for crazy hair day and I can definitely say she did. We decided to put her hair up in about 8 ponytails all over her head. It was CRAZY!! She was so cute. She got to wear my favorite sunglasses to school and was very excited. I was surprised they came back in one piece. I was so proud of her. Today is crazy sock day and she has one thigh high panda sock and one thigh high heart sock on. It's adorable. Tomorrow is hat day, then jean day, and FINALLY costume day! They have Halloween parties that day and a whole bunch of other stuff going on. We are making Ghost Pops for the party and I will let ya'll know how that goes. They should be really cute. Okay okay, I'll quit going on and let ya'll know about this WONDERFUL face toner now.
So I'm 23 years old and I still have acne. I don't have a single clue as to why this is but it is. I have tried everything I can possibly think of to get rid of my acne but nothing helped in the long run. Don't get me wrong, some things worked. But after about two months of me using it, I would start breaking out again. I was REALLY tired of it.
I have been, slowly, trying to go to a more natural beauty regimen. I searched around the internet for a while for a good, natural toner but I didn't want to put any type of vinegar on my face. I don't like the smell of vinegar and I just couldn't feel good about walking around smelling like a pickle all day.
FINALLY!! I found an all natural toner that I could feel comfortable about using. I stumbled apon this amazing blog post that helped me out SO much. You can look at it at Say Not Sweet Anne. I read that Leeds Metropolitan University presented a study with findings that show that thyme may be more effective at treating acne than prescription creams. I found this VERY interesting. So I knew what I was going to do. Ya'll, I went straight to the store.
Here's how you make it. You'll need:

After a week or so of using this my acne greatly decreased. Now, sometimes I get lazy and don't wash my face at night. I know I know this is very bad. But ya'll, sometimes I've just been so busy and there is just no way for me to make myself go in that bathroom and scrub my face. When this happens I, of course, break out. Usually on my chin or forehead and it always hurts. I can use this toner though and the pain goes away within two days and it's never huge and red like it use to be.
I swear by this stuff ya'll! Just try it. You won't regret it. Let me know how it works for you! I would love to hear your story.
This post has been shared at Thank Goodness It's Monday at Nourishing Joy.
So I'm 23 years old and I still have acne. I don't have a single clue as to why this is but it is. I have tried everything I can possibly think of to get rid of my acne but nothing helped in the long run. Don't get me wrong, some things worked. But after about two months of me using it, I would start breaking out again. I was REALLY tired of it.
I have been, slowly, trying to go to a more natural beauty regimen. I searched around the internet for a while for a good, natural toner but I didn't want to put any type of vinegar on my face. I don't like the smell of vinegar and I just couldn't feel good about walking around smelling like a pickle all day.
FINALLY!! I found an all natural toner that I could feel comfortable about using. I stumbled apon this amazing blog post that helped me out SO much. You can look at it at Say Not Sweet Anne. I read that Leeds Metropolitan University presented a study with findings that show that thyme may be more effective at treating acne than prescription creams. I found this VERY interesting. So I knew what I was going to do. Ya'll, I went straight to the store.
Here's how you make it. You'll need:
- Witch Hazel. This is all natural and has A LOT of uses. Luckily this is one of them.
- Thyme. You can use fresh or dried, just make sure there are no pesticides. You don't want those on your face.
- Time

This makes me realize I really need to clean my windows ya'll. They are REALLY dirty.
After a week or so of using this my acne greatly decreased. Now, sometimes I get lazy and don't wash my face at night. I know I know this is very bad. But ya'll, sometimes I've just been so busy and there is just no way for me to make myself go in that bathroom and scrub my face. When this happens I, of course, break out. Usually on my chin or forehead and it always hurts. I can use this toner though and the pain goes away within two days and it's never huge and red like it use to be.
I swear by this stuff ya'll! Just try it. You won't regret it. Let me know how it works for you! I would love to hear your story.
This post has been shared at Thank Goodness It's Monday at Nourishing Joy.
Cutting Your Own Bangs
Yes. I cut my own bangs. I know, I know. You're not suppose to do that right? Well. I. Do. And I have to say that this is the best my bangs have ever looked. I have tried and tried to find someone to cut my bangs just right, but it's impossible. They either cut them crooked or to short. I got tired of having to pin them back for a couple weeks till I could get them cut again and start all over. The last time someone else cut my bangs they ended up halfway up my forehead (and I have a big forehead) and it took forever for them to grow out where they looked good. For me, the best looking bangs are these:
Do you want these bangs? Most do. They're the most flattering on most face shapes.
Start by getting your supplies together. You're gonna need:

Here is the video that I use
Have fun with your new look!
Do you want these bangs? Most do. They're the most flattering on most face shapes.
Start by getting your supplies together. You're gonna need:
- Hair cutting shears. You really want to invest in a pair of these. I bought a pair from Walmart. You can also find them on Amazon and at Sally's. You don't wanna use regular scissors because they will bend the hair before cutting it and that will cause split ends.
- Rat tail comb
- Hair band for pulling the rest of your hair back.

-
Now that we have all of our supplies, lets get cutting! Here's what you do:
- Start with clean, dry, straight hair. You will also want to start with a middle part in your hair.
- Take your rat tail comb and find the middle of your head (this can be modified, towards your face for thinner bangs and farther back for thicker bangs).
- Take the pointy end of your rat tail comb and section it off to the front of your ears on each side. This will make a triangle.
- Pull back the rest of your hair with the hair band.
- You want the edge of your bangs to be at the edge of the color part of your eye. So if you're looking forward, take your comb and section off one side your hair. Take the extra hair and pin it back. You don't want it to get in the way. Do the same with the other side.
- Now comb your bangs straight and even. If you have some hair that is under the other they will be uneven when you cut.
- Comb your bangs again but this time grab them with your dominant hand. So if you're right handed take your bangs in your right hand. If you're left handed take them in your left.
- Now we are going to twist. If you have your bangs in your right hand then you are going to twist over. So the left side of your bangs are going under and the right side is going over. It will be opposite sides if your left handed.
- Grab your bangs with your opposite hand and finish the twist. They will be twisted over only once.
- Hold your bangs very loose. Don't pull them tight. Rest your hand close to your face that way your bangs are even.
- Now cut! You will want to cut in short upward motions. Like you're cutting into the hair. This way is much more forgivable when cutting your hair then if you where to cut straight across.
- Let your hair go now and see your awesome work! If they are too long then just start back at step 6 and cut a little more. ALWAYS REMEMBER you can cut more hair off but you can't glue any back on. Take. Your. Time.
Here is the video that I use
Have fun with your new look!
Kids and Gender Roles
I was watching "The Chew" this afternoon and they mentioned something they saw online about a father being berated for teaching his son to cook. Of course, they all thought it was very wrong; which it is. The father should definitely be teaching his son to cook! Women always like a man who can cook.
 Gender roles are something I hear a lot about living in the south. Oddly enough I hear it more from kids than I do parents. I will occasionally hear a child say "I'm not doing that, that's a boy's chore." or "I don't have to clean because I'm a boy." I don't know where they get it from, but it's a problem that we face head on in our house.
The only one I have to worry about right now is Hailey and I have (luckily) not had this problem with her yet. Although I'm sure it will come. Just like I'm sure it will come with Letty and the new baby when they are older.
 Both of my daughters play with cars and tractors all the time. They also play with dolls and stuffed animals. There is no reason a girl can't play with "boy" toys. Just like there isn't a reason a boy can't play with "girl" toys. My husband and I have always let our kids pick out what they want to play with. One of the first toys Letty ever picked out at the store was a blue and green toy car. She loved it. Our nephew, when he was little, loved to play with beaded necklaces and shoes. He would run around his Nanny's house with her flip flops and necklaces and just play. He is now 8 years old, plays football and is a typical boy. There was no reason for us to take them away from him. They made him happy and that's all that matters.

Before Hailey was born, my husband and I talked about gender roles. I was nervous, thinking that he would want the girls to have their toys and their chores in the house and the boys to have their toys and their chores outside. Boy was I wrong! He was very adamant about them having the option to choose the toys they want to play with along with them learning to do chores outside and inside. I don't have any sons yet, but my daughters go outside and help out just as they help in the house. Hailey loves to help cook and she loves going outside and raking leaves.
 Boys and girls should both learn what it takes to cook, clean, and take care of a house. We definitely don't subscribe to gender roles in this house. This is something I feel very passionate about (if you couldn't tell). What do you think of gender roles?
The only one I have to worry about right now is Hailey and I have (luckily) not had this problem with her yet. Although I'm sure it will come. Just like I'm sure it will come with Letty and the new baby when they are older.
Before Hailey was born, my husband and I talked about gender roles. I was nervous, thinking that he would want the girls to have their toys and their chores in the house and the boys to have their toys and their chores outside. Boy was I wrong! He was very adamant about them having the option to choose the toys they want to play with along with them learning to do chores outside and inside. I don't have any sons yet, but my daughters go outside and help out just as they help in the house. Hailey loves to help cook and she loves going outside and raking leaves.
Fun Family Activities for Fall
I don't know about yall, but I love autumn! It means football has started (hopefully the Saints will start doing better for me), and Halloween and Thanksgiving are around the corner. This is my favorite time of year. The family gets out in the yard and plays and rakes leaves. It's wonderful! We all have a great time just being together. I believe just taking the time to be present with your kids (and even the husband) is about the best gift you could ever give your family. They will probably never thank you for it, but I believe it makes for a great childhood.

I can never seem to come up with a good idea for a game or activity for all of us while we're outside. I absolutely hate the idea of jumping in a pile of leaves because I always think spiders are going to get on the kids. We live in the woods ya'll, so they're everywhere! So I thought I would think really hard and try to come up with something.


I hope this is a good start to ya'll fall fun! It doesn't matter what you do, it just matters that you get out and have fun! What does your family love to do in the fall time?
I can never seem to come up with a good idea for a game or activity for all of us while we're outside. I absolutely hate the idea of jumping in a pile of leaves because I always think spiders are going to get on the kids. We live in the woods ya'll, so they're everywhere! So I thought I would think really hard and try to come up with something.
- Build a fire pit. Everyone enjoys a good bonfire to roast marshmallows and hot dogs right? It doesn't have to be anything fancy. (If you're wanting to make it really nice, Pinterest has A LOT of great ideas.) We actually made one last weekend with some extra cinder blocks we had around the house. It's open on one side so we can rake leaves into it, that way we can clean the yard a little before the marshmallows. DO NOT roast your food over burning leaves. I promise you they won't taste good.
- If you're not worried about bugs and spiders, then rake a big huge pile of leaves and let your kids get crazy! I promise they will have a blast jumping and throwing them everywhere.
- I haven't tried this yet, but I'm thinking lawn bowling would be a fun idea. We usually have a couple of 2-liter bottles around somewhere. I'm thinking I could fill them up half way or a little less with water and place them at the bottom of one of our small hills and let them try to roll the soccer ball into them to knock them over. I bet they would love it. I would probably even get in on that game.

I hope this is a good start to ya'll fall fun! It doesn't matter what you do, it just matters that you get out and have fun! What does your family love to do in the fall time?
Getting Started!!!
Ok…..I've started a blog. Here comes the hard part; figuring out what to write about.
I decided to start a blog for several reasons. I have varied interests. I'm one of those people who kinda get bored quickly with things. So I try several things before I figure out what I like and want to stick with. I've realized that there are several people who are like me and I wanted to share my experiences with everyone who would listen.
Also, I wanted to make a little bit of money. My husband works for himself. Well, him and his dad. And the work is really only half of the year. So now, with our third child coming along, trying to build a new house (on an extremely small budget) and trying to go back to school, we could really use any little bit of money I can make.
So let me tell you what you can expect from me. I plan to write about everything that life throws at me. I do a lot of DIY projects. From building furniture to making laundry detergent. I try to make things a little healthier for my family. We are planning to build a house very soon so I will fill ya'll in on everything that entails (which is a lot). And I will most likely rant about my kids and the joys and trials of raising little ones. I also love to cook and try new recipes so I'll let ya'll know how all of that goes. You'll probably find a new recipe to try with your family. To me, this is truly a lifestyle blog. This will show the true life of a DIY southern momma. I really hope ya'll enjoy!
Don't forget to check out the new facebook page. www.facebook.com/mishapsofasouthernmomma
Subscribe to:
Comments (Atom)
Pin It


